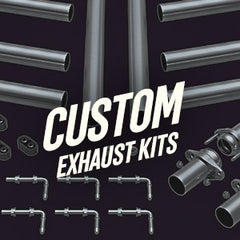


When it comes to building your own custom exhaust, there are some best practices to ensure your system not only performs well but looks good doing it. We have all the parts to make your custom exhaust happen here at MagnaFlow and we want to offer you some tips on putting them all together.
MagnaFlow is renowned for its stainless steel exhaust components that ensure efficient flow, great sound, and lasting performance. Putting together your own stainless steel exhaust system is certainly doable for an experienced garage mechanic, so, let’s go over the tools you’ll need in your arsenal to get things underway.
Tools
Unless you are purchasing a complete axle-back or cat-back exhaust system, any custom work will generally require a welder. When it comes to welding stainless steel, there are a few different options.Both MIG (metal inert gas) and TIG (tungsten inert gas) welding use an electric arc to fuse metal together. The difference between these two welding methods is the way in which they use the arc. MIG welding uses a feed wire that moves through the gun to create a spark and melt into the weld—think of it like a hot glue gun for metalwork. TIG welding, on the other hand, can be used to directly bond two pieces of metal, with or without filler. If you choose to use a filler while TIG welding, it is held by hand.
For an experienced welder, TIG welding is a great choice. If you are welding for the first time, however, we recommend MIG welding as you can master it in less time. With that said, practice on some scrap before going at your exhaust.
In addition to a welder of your choice, having the necessary safety equipment is of the utmost importance. Welding can be dangerous, so make sure you are using quality eye and heat protection. We also advise you to apply sunscreen to any skin exposed to heat from welding.
When it comes to fabricating your exhaust, having access to a grinder—with cutting and sanding discs—as well as a band saw will drastically reduce the time it takes to construct your exhaust. You can cut sections of pipe without these tools, but if you plan on making more custom exhausts in the future, having the proper equipment is a worthwhile investment.
Getting Started
Preparation is key with any exhaust project, so ensuring proper access to your vehicle’s underside is just as important as having the right tools. A two-post lift is certainly convenient (and “garage goals”), but we understand that not every DIYer has access to that level of machinery.With that understanding, we recommend jacking your car up as high as possible, and like all projects, putting safety first. Jack stands should always be used when working under your car. Be sure that you are jacking and supporting your vehicle at proper lift points, and remember to check that everything is stable before crawling underneath.
Planning Ahead
Planning your exhaust system requires a few considerations, primarily routing and clearance. You want to make sure that your exhaust system does not touch anything under your car, as contact with either the chassis or other components will likely cause unpleasant rattles, ruining the fun of your new exhaust note.Exhaust components also get extremely hot, so it is vital that your exhaust system is routed away from floor-mounted master cylinders, brake lines, the starter, solenoids, and all wiring. Keep in mind that carpet and insulation mounted to a metal floor pan are also flammable, so provide enough space to keep things cool.
In addition to giving your running gear and chassis some breathing room, you’ll want to give the road some as well. Ground clearance, even on streetcars, is always important for drivability. Generally speaking, it’s best that your exhaust system doesn’t hang below the lowest point of your undercarriage and that it is tucked-up as high as possible. For rear-wheel-drive cars, the lowest point is often the rear differential, but this can vary depending on the car.
Once you have an idea of where your exhaust piping will start and end, and how it will bridge the gap between those points, it’s time for the fun part—digging into your MagnaFlow goodies and putting them all together.
Putting It All Together
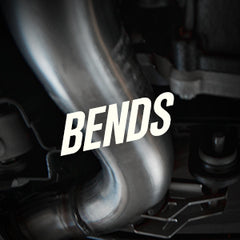
Many OEM exhausts or systems made at your local exhaust shop use compression bent pipes, meaning that the pipe is ‘crushed’ to create a bend. This type of bend can create a restriction in your exhaust by decreasing the interior diameter of the piping on curved sections. MagnaFlow, however, is all about, well, flow. Mandrel-bent piping maintains the interior diameter of the piping around bends, reducing restriction and heat in your exhaust system. This ultimately leads to better performance and is why all MagnaFlow exhaust components feature mandrel-bent piping whenever possible. While the only downside to mandrel-bent piping is that it requires a bit more cutting and welding when creating a custom exhaust, we promise the performance and bragging rights are worth the extra time.When you start putting your pieces of pipe together, you’ll want to start from the headers and work your way toward the exhaust tailpipe. If you choose to make custom headers, you will likely want to connect them to the rest of your exhaust with what’s called a ball flange connector. This connection ensures a tight seal but allows you to separate your exhaust from the headers if your car requires servicing.
Since most engines are mounted on rubberized or fluid-filled mounts to reduce vibration, your exhaust system needs to allow for some play as the engine moves. Positioning a flex-pipe close to the beginning of your exhaust dampens any engine movements that would otherwise be translated to your exhaust.
When connecting sections of pipe, it’s also good practice to make tight joints and use a permanent marker to create reference marks on each side of a connection. Tight joints will make the welding process easier, as you will be filling a far narrower gap between components. Creating reference marks will also ensure that when you go to tack weld your components, everything is properly clocked, saving you from headaches later on.
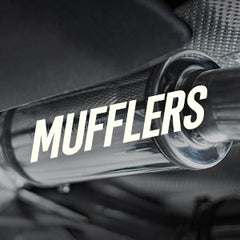
At some point in your exhaust, you will likely want to include a resonator, muffler, or both. MagnaFlow has numerous options when it comes to mufflers and resonators, but be sure to understand any sound restrictions in your state or county before choosing the best components for your application.
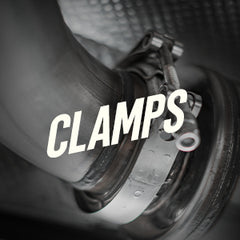
For some enthusiasts, modular sections that allow for removable mufflers might be desired. MagnaFlow’s wide variety of clamps and V-band connections are great for this purpose and can turn a streetcar into a track car within minutes.

Of course, the last part of planning your exhaust is choosing where it will exit and what tips you will use. MagnaFlow is getting ready to release some exciting new tip options, so stay posted!

Tacking and Welding
The first step in welding your exhaust is tack welding your component parts together. Tack welding is when a small weld is used to temporarily connect two pieces of metal. When you make a tack weld, move the tip of the welder from one section of pipe to the next as opposed to simply filling the joint. This ensures a stronger and more reliable tack for mocking-up your exhaust.You want to tack weld your exhaust as you move from the header to the tailpipe, but resist the urge to completely close any joints with a full weld; if you make a mistake, a tack weld can be easily cut and the joint changed.
Once you have tack welded your entire exhaust and ensured proper clearance, you can begin the actual welding process. Settings for your welder will vary by model and conditions, but there are some general tips applicable to virtually every exhaust build.
With your exhaust still connected to the car, you want to begin your final welds. Visualize each joint as being broken into fourths, with one fourth at the top of the joint and one fourth at the bottom. Begin by welding the fourths located on the side of the joint, moving from the top to the bottom. You always want to weld on a downward slope and with decent speed, ensuring your wire is placed just before the molten pool of metal that is filling the gap. To avoid distortion from heat soak, work with speed, and allow welds to cool from time to time. Once you have partially welded all of your exhaust joints, remove the system from your car and complete the top and bottom welds with the exhaust securely on the ground. Once complete, allow your exhaust to cool before handling and reinstallation.
With this guide, we hope you feel empowered to tackle your own, custom high-quality exhaust. If you have any questions about what MagnaFlow parts are right for your specific project, please reach out to our customer service team at 1 (800) 990-0905. We’re happy to answer your questions!
SHOP NOW